
Mac Users' Ultimate Tutorial: How to Convert and Save Songs From CDs

Mac Users’ Ultimate Tutorial: How to Convert and Save Songs From CDs
Key Takeaways
- External USB disc drives are necessary for ripping music on most modern Mac computers without built-in optical drives.
- The Music app or iTunes can be used to rip audio CDs.
- Digital music files ripped from an audio CD can be freely copied, backed up, or uploaded without digital rights management restrictions.
Whether you’re digitizing a decades-old music collection, or buying music physically for the first time, it’s still easy to rip an audio CD and store it in your own digital music library. Here’s how to rip an audio CD on a Mac.
The general process for ripping music is still the same as it was decades ago, but the tools have changed over the years. Apple hasn’t sold a computer with a disc drive since 2016, when the mid-2012 13-inch MacBook Pro was finally discontinued , so you need an external USB disc drive for most Macs. Apple also replaced iTunes with a new Music application in 2019 with the release of macOS Catalina , but it still supports playing and ripping audio CDs.
You Need a Disc Drive
Most modern Mac computers don’t have a built-in optical disc drive. Thankfully, most external USB disc drives work with macOS, and both DVD and Blu-ray drives can read CDs. If the drive can both read and write discs (DVD-RW or BD-RW), you can also use iTunes or Music to burn new audio CDs.
If you don’t already have a disc drive, the ASUS ZenDrive Silver is a basic option with support for reading and writing CDs and DVDs. It should come with a USB Type-C cable in the box, but if not, you might need a USB Type-A-to-C adapter or USB hub to connect it to some Macs.
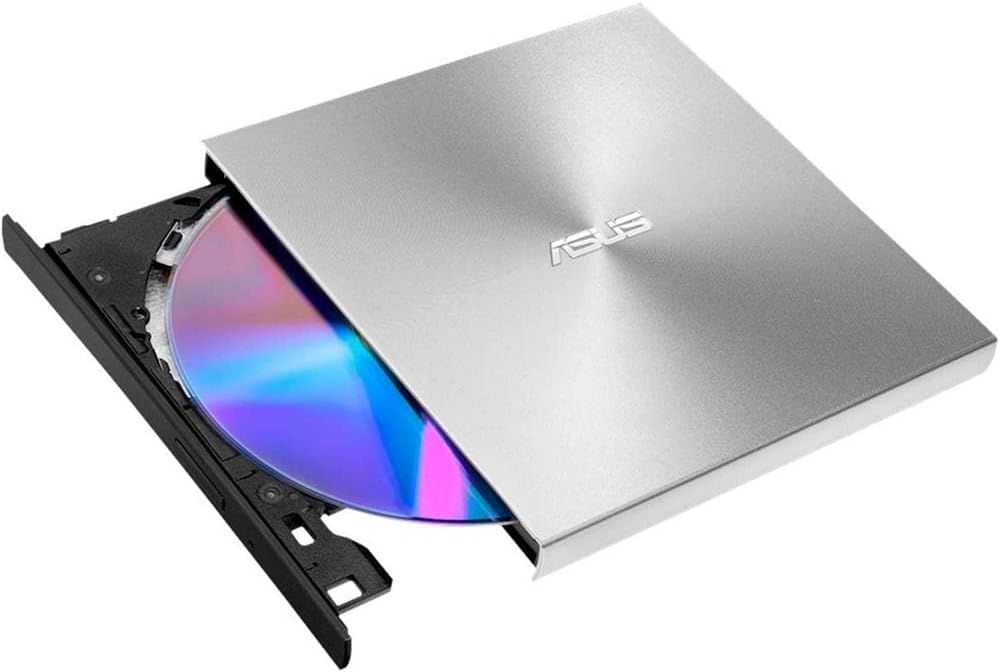
ASUS ZenDrive Silver
The ASUS ZenDrive Silver is a basic and affordable external optical drive, with support for reading and writing DVDs and CDs. It’s designed for both Windows and Mac.
$35 at Amazon See at Walmart See at Best Buy
You can also use those drives to read data CDs and DVDs, and play DVD movies on your Mac with the built-in DVD Player application.
Rip a CD With the Music App or iTunes
If you have a Mac running macOS 10.15 Catalina or later, you can use built-in “Music” app to manage your digital library and rip audio CDs. If you have an older Mac with iTunes installed, the process is roughly the same.
First, open the Music application. You can find it by opening Spotlight (Command+Space) and typing “music.app” or by clicking the Launchpad in your macOS dock and clicking the Music icon. If you don’t see it, try searching for iTunes instead.
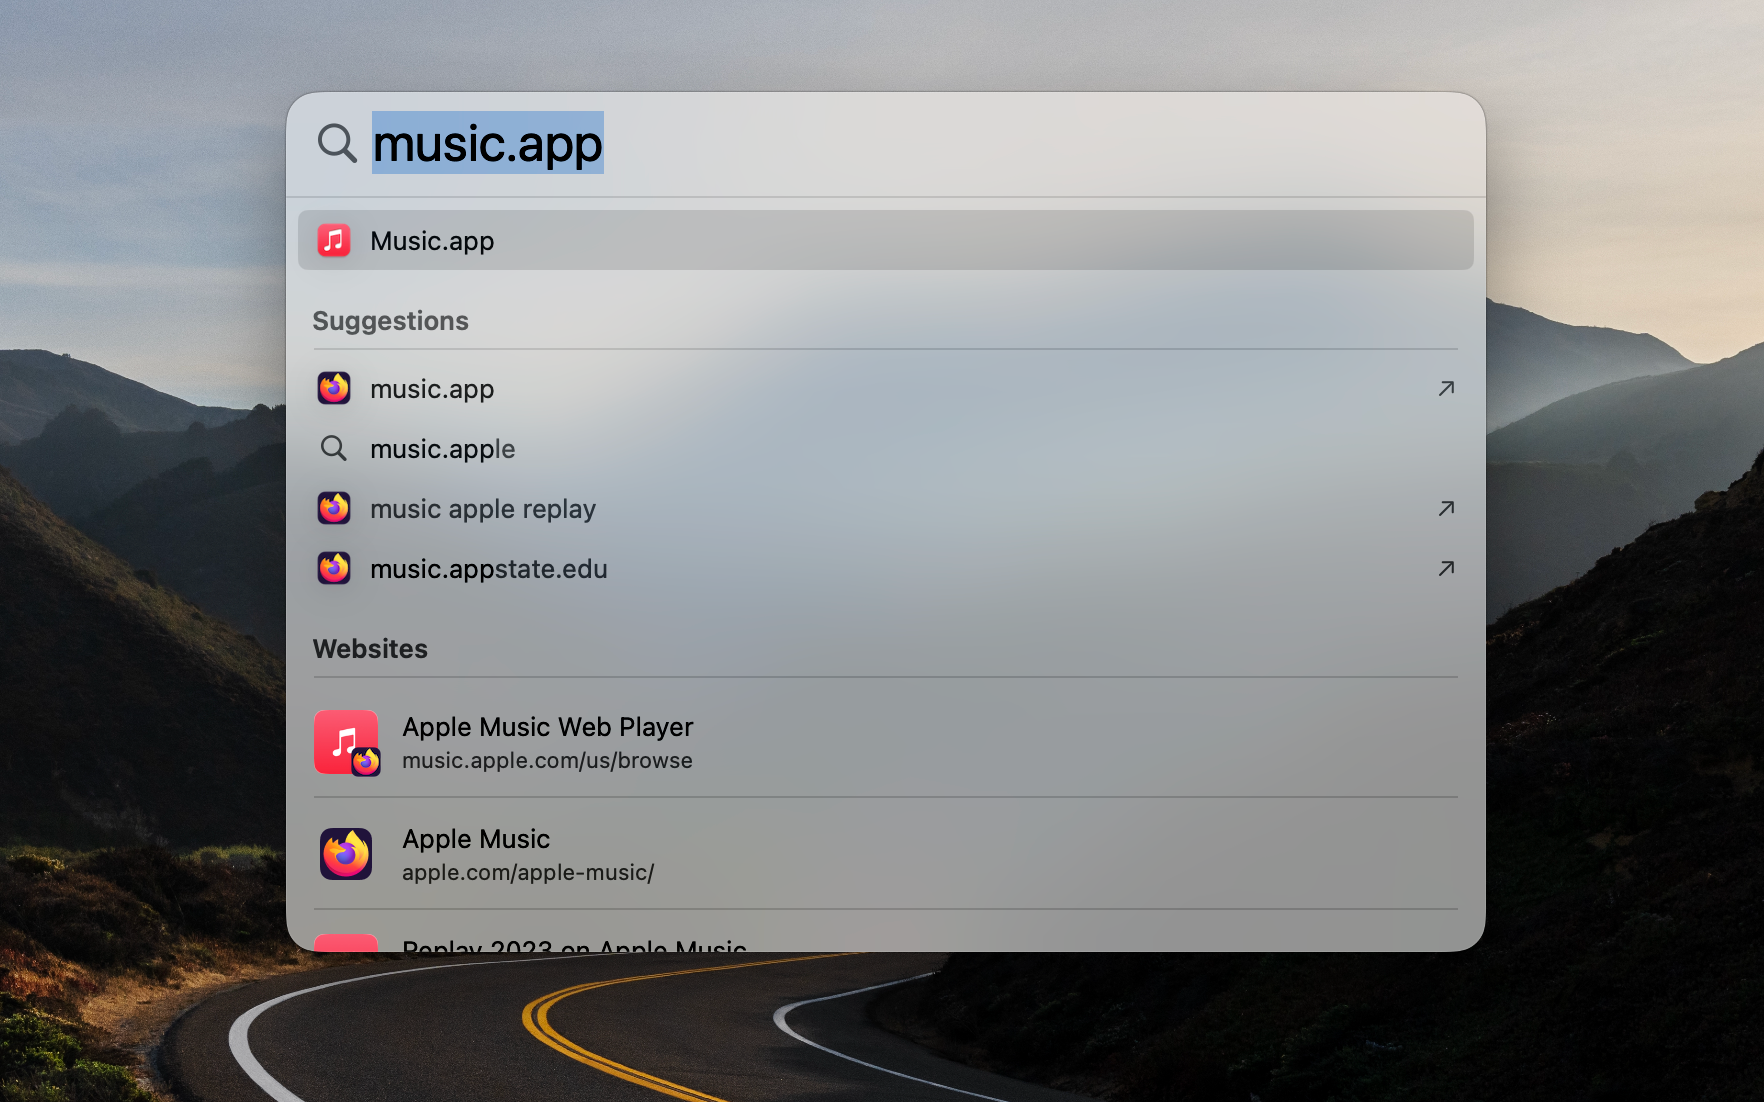
If you’ve never used the Music app or iTunes, you might be asked to go through a short setup process. There are also advertisements for the Apple Music service. You do not need to sign up for Apple Music to play your own owned music.
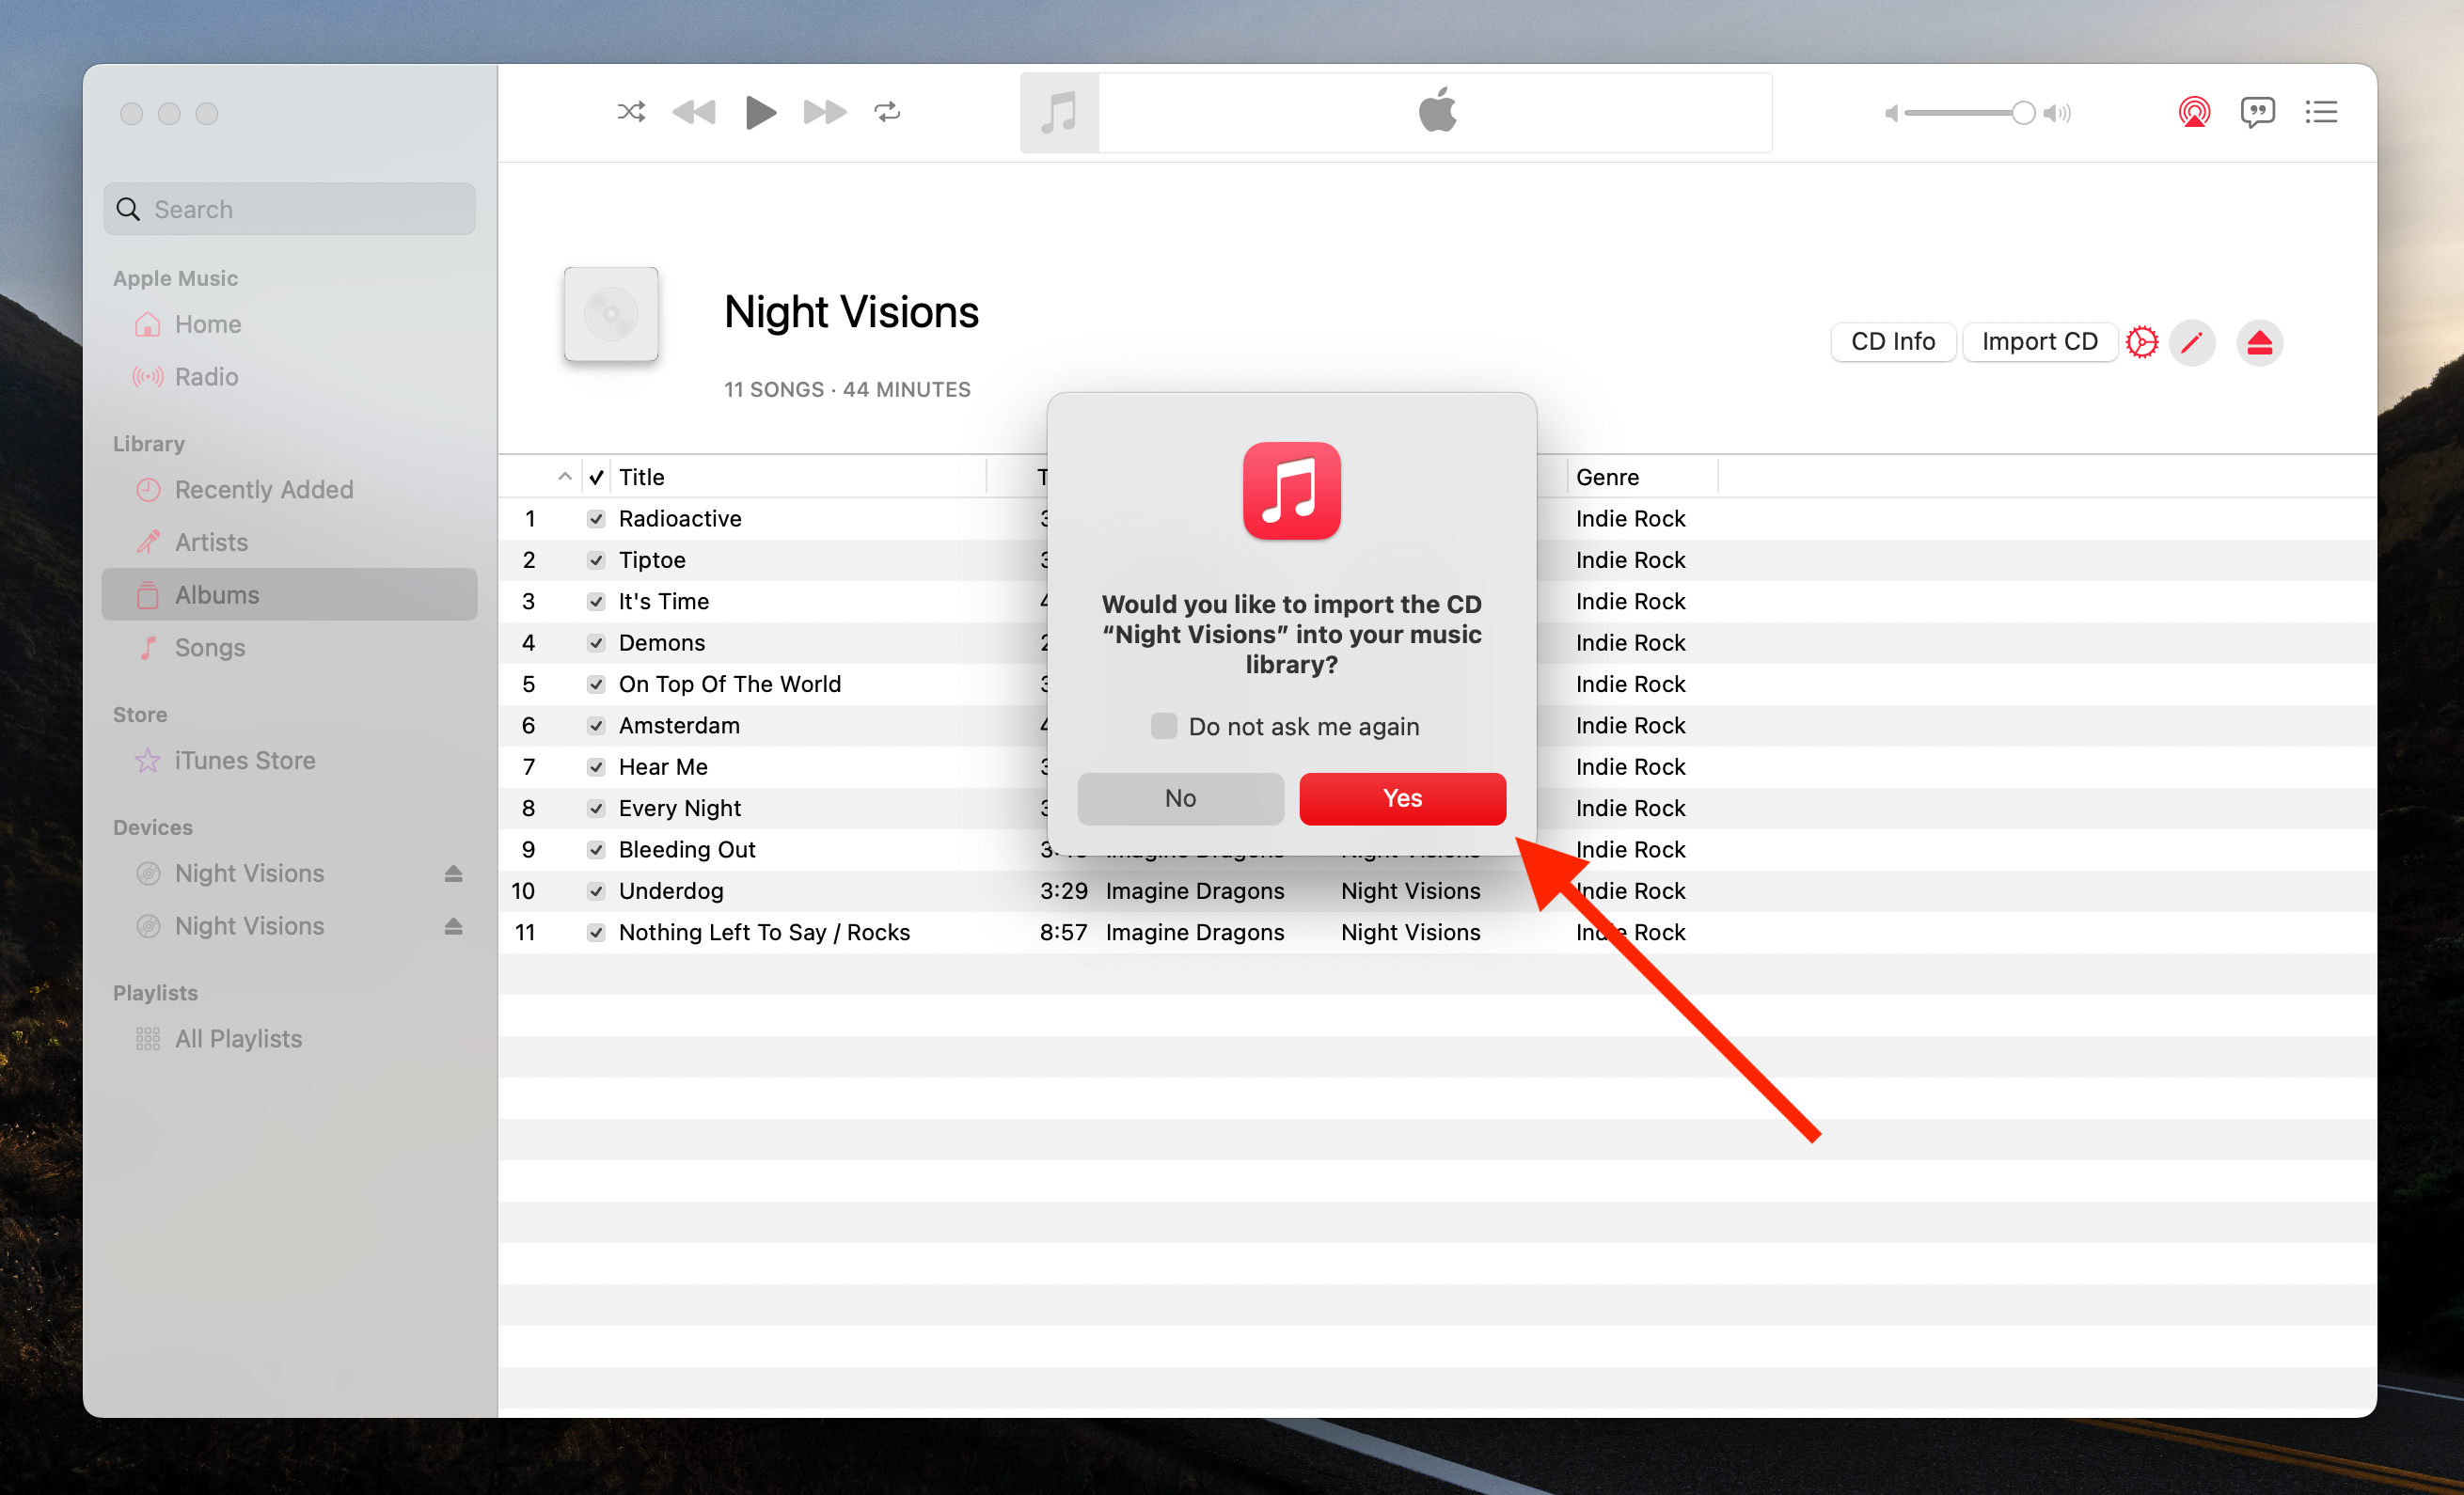
Next, insert the audio CD into your drive, if you haven’t already. External drives might cause your Mac to ask permission before reading any data—click “Allow” if you get that message. The Music/iTunes app might automatically ask if you want to import the CD. You can click “Yes” to start ripping the CD.
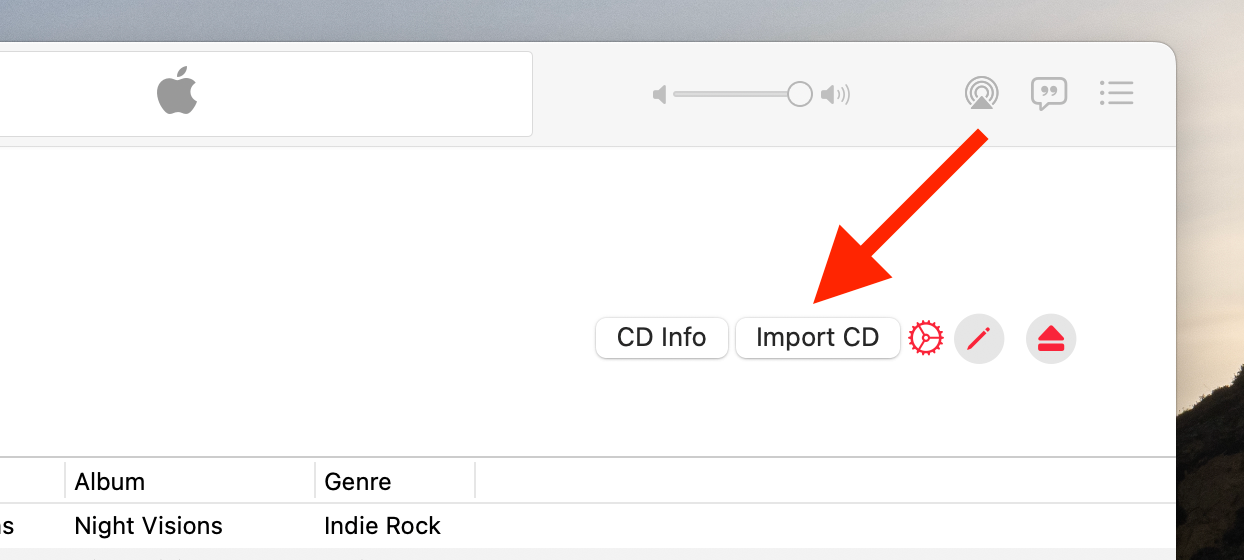
If there was no automatic prompt, click the music CD in the sidebar, then click the Import CD button near the top of the window.
You’ll see the available formats for importing the audio, including AAC, MP3, Apple Lossless (a lossless compression format similar to FLAC), and WAV. The Music app saves audio from CDs as AAC-encoded files with a 256 kbps variable bitrate by default, which is a good balance between audio quality and storage space.
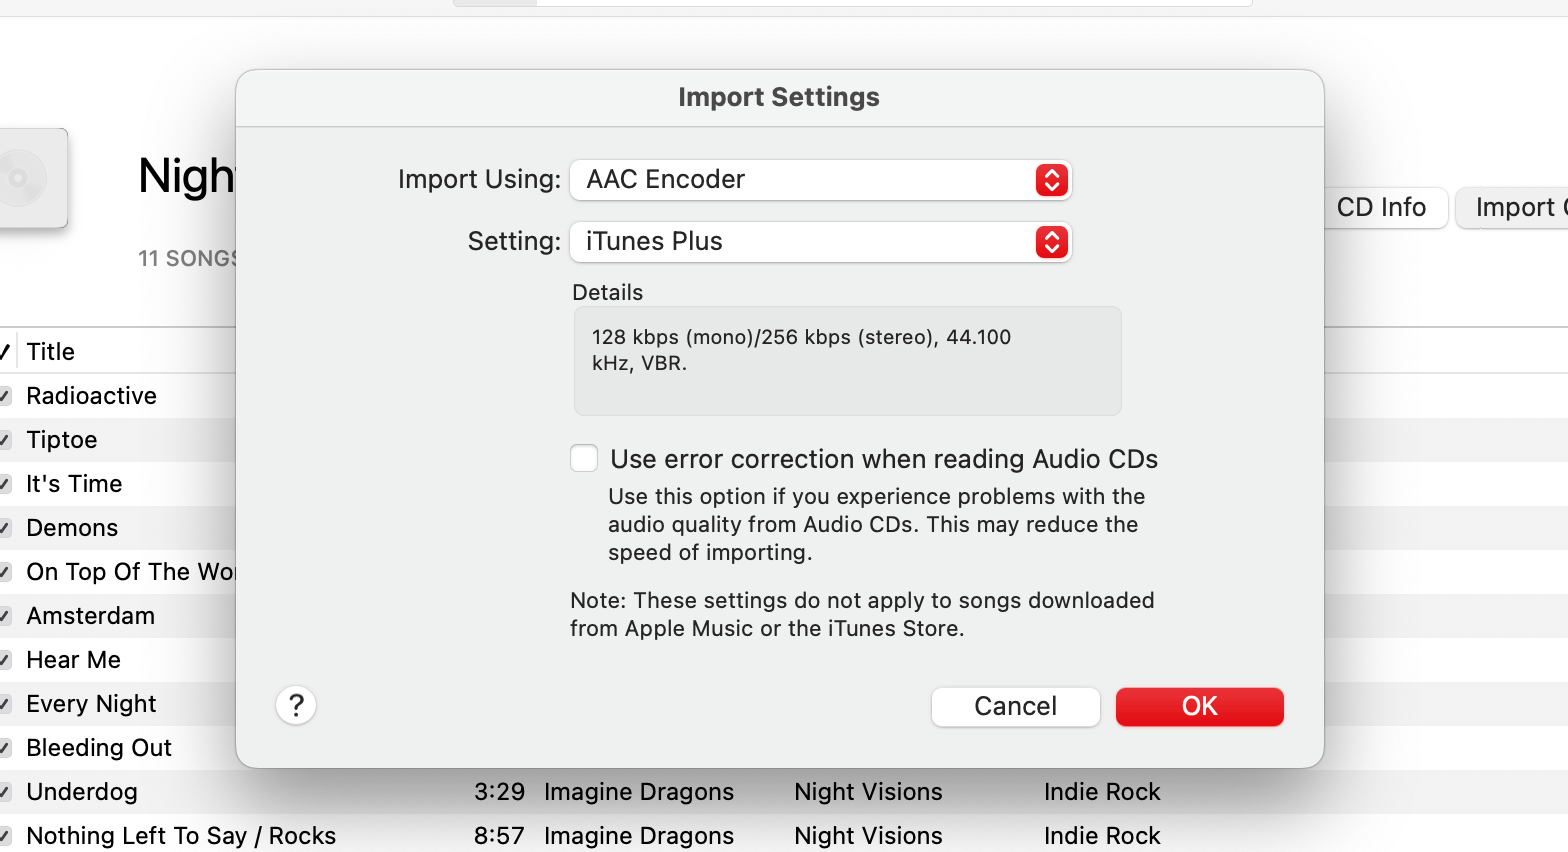
Most people should just stick to the default AAC Encoder and iTunes Plus settings, but the other options can be helpful in specific use cases. For example, if you plan to copy music to a music player or other device that only supports MP3 files, you might want to import music in that format instead of AAC. Apple Lossless would give you the highest quality possible, but the difference isn’t all that noticeable with typical speaker or headphones. You can also change the import settings later by clicking “Music” in the main menu bar, then navigating to Settings > Files > Import settings.
You can click OK to start the import. The app will start ripping the data from the disc, encoding it in the selected format, and saving it to your music library.
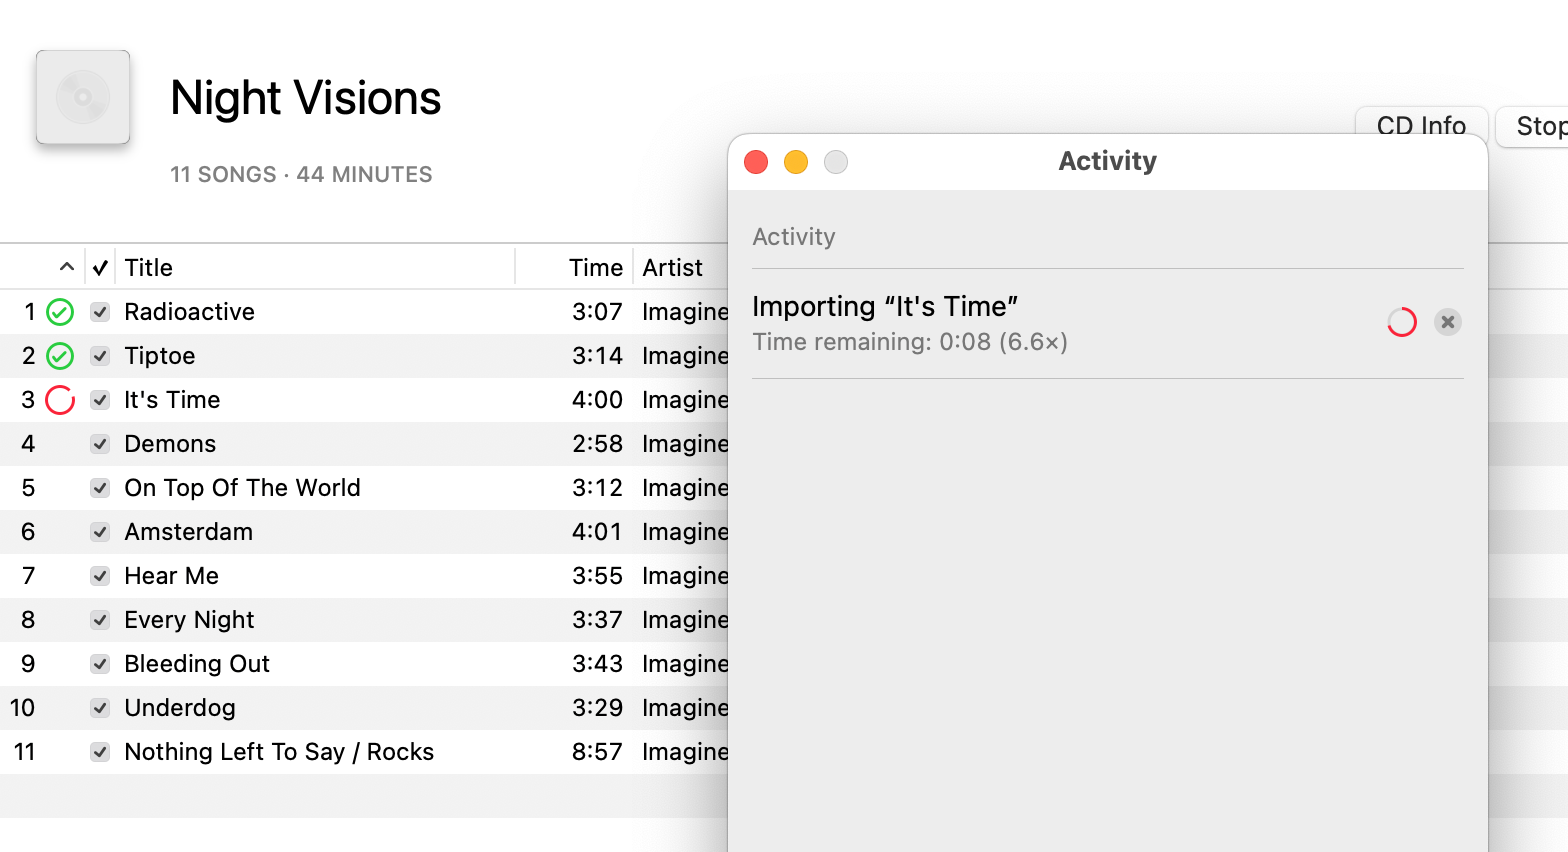
When the process is complete, you can click the eject button (in the sidebar or near the “Import CD” button) to eject the disc. The music will be saved in your library, where you can play it or synchronize it to a connected iPhone, iPad, or iPod.
You can also automatically add album art by selecting a song or album, opening the context menu (right-click or click while holding down the Command key), and selecting “Get Album Artwork.” If the Music app or iTunes can’t find the artwork, you can use a website like Music Hoarders Covers to find it manually.
Backing up Your Music
You can access the music file by selecting a song or album, opening the context menu (right-click or click while holding down the Command key), and selecting “Show in Finder.” The files can also be found inside the Music directory in your Home folder.
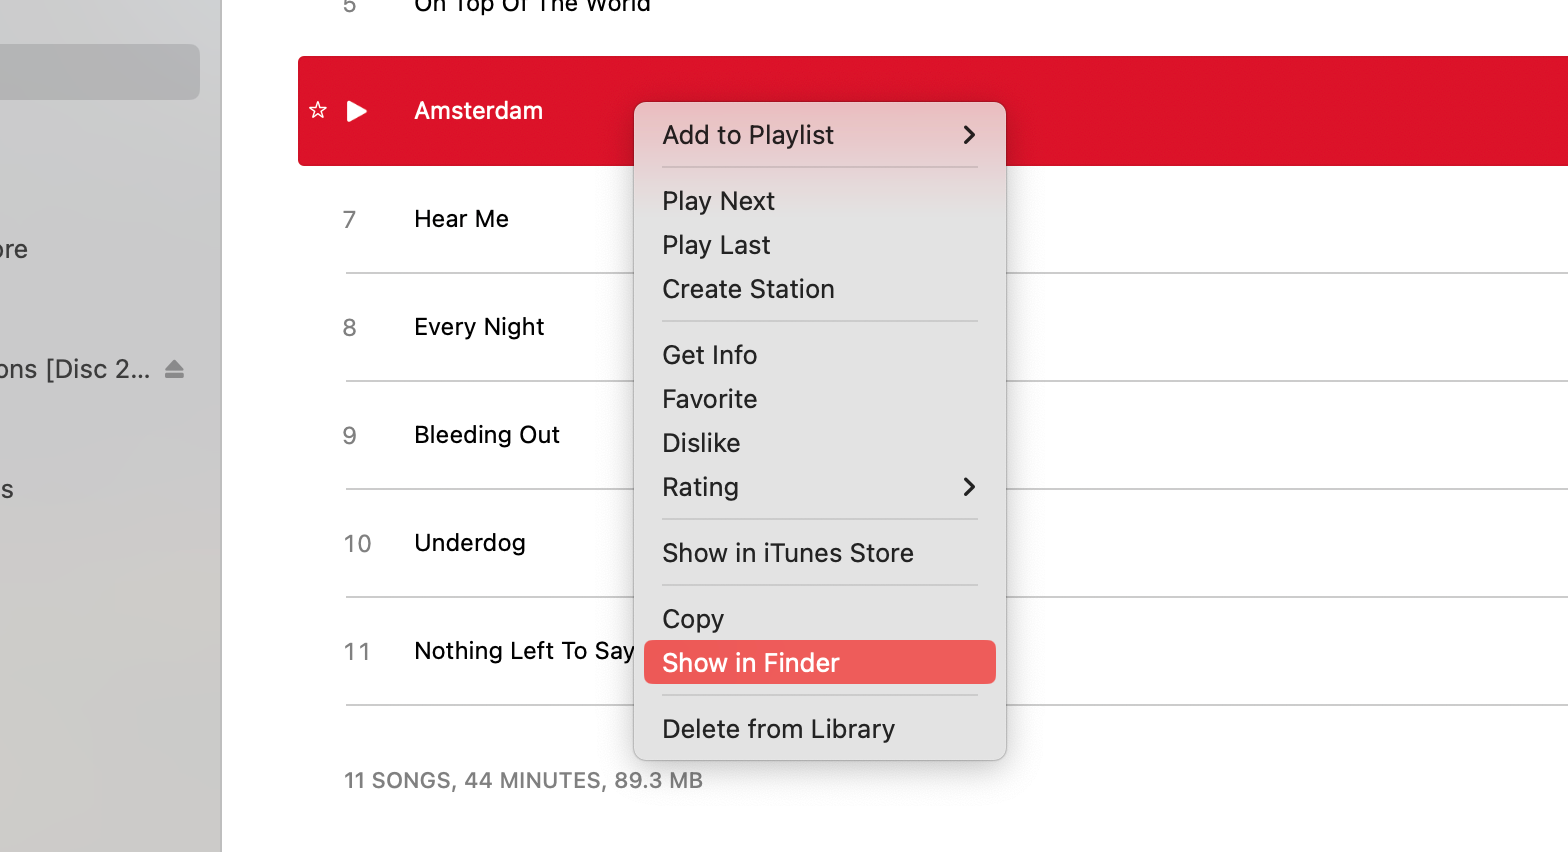
There’s no digital rights management (DRM) on music you rip from an audio CD, so you can freely copy it to your other devices, back it up to another drive, or upload it to your cloud storage.
Also read:
- [New] In 2024, World's Best 5 Streaming Videography Tools
- Can You Rely on ChatGPT or Bard for Your Financial Guidance Needs?
- Confirming the Health of Your Windows 11 Setup
- Exploring Elon Musk's Ambitious Venture Into TruthGPT Technology
- Exploring the Possibilities: How ChatGPT Is Shaping the Future of Medicine
- How to Unlock a Network Locked Infinix Smart 8 Plus Phone?
- How to Unlock Motorola Moto G84 5G Without Password?
- In 2024, How To Stream Anything From Poco C65 to Apple TV | Dr.fone
- In 2024, Modulating Murmurs for Free Fire Success
- Latest Canon PIXMA MG2522 Driver Update - Download Here!
- No More Crashes in Risk of Rain 2 - Troubleshooting Guide
- Optimized Approach to Delete Unwanted YouTube Posts
- Revolutionary Interactivity: Analyzing Top 5 Cutting-Edge AI Prompt Creators
- Setting Up the Microsoft Bing AI Chatbot on Your Android Phone's Input Method
- The Afterlife of Internet Chats: Exploring Who You Might Be Messaging From Afar
- Unleash the Potential of Written Expression
- Title: Mac Users' Ultimate Tutorial: How to Convert and Save Songs From CDs
- Author: Jeffrey
- Created at : 2024-11-13 02:13:08
- Updated at : 2024-11-18 16:45:58
- Link: https://tech-haven.techidaily.com/mac-users-ultimate-tutorial-how-to-convert-and-save-songs-from-cds/
- License: This work is licensed under CC BY-NC-SA 4.0.