
Guide to Turning On Hardware-Based GPU Task Prioritization for Enhanced Performance in Windows 11
Guide to Turning On Hardware-Based GPU Task Prioritization for Enhanced Performance in Windows 11
Quick Links
- What Is Hardware-Accelerated GPU Scheduling?
- Should You Enable Hardware-Accelerated GPU Scheduling?
- What You’ll Need to Make This Feature Work
- Turn On Hardware-Accelerated GPU Scheduling in Windows 10
- Enable Hardware-Accelerated GPU Scheduling in Windows 11

Key Takeaways
- Hardware-Accelerated Scheduling reduces the load on your CPU and can improve your PC’s performance.
- To enable it on Windows 10, head into Settings > System > Display > Graphics Settings and toggle on “Hardware-Accelerated GPU Scheduling.”
- On Windows 11, navigate to Settings > System > Display > Graphics > Change Default Graphics Settings and enable “Hardware-Accelerated GPU Scheduling.”
Windows 10 and Windows 11 come with an advanced setting, called Hardware-Accelerated GPU Scheduling, which can boost gaming and video performance using your PC’s GPU. We’ll show you how to enable the feature and thereby potentially get a performance increase.
What Is Hardware-Accelerated GPU Scheduling?
Usually, your computer’s processor offloads some visual and graphics-intensive data to the GPU to render so that games, multimedia, and other apps run smoothly. The CPU gathers the frame data, assigns commands, and prioritizes them one by one so that the GPU can render the frame.
With the Hardware-Accelerated GPU Scheduling feature, the GPU’s scheduling processor and memory (VRAM ) take over the same work and runs it in batches to render the frames. This allows your GPU to reduce the load on your CPU and improve latency, potentially making your PC run better.
Should You Enable Hardware-Accelerated GPU Scheduling?
If you have a supported graphics card, it’s a good idea to enable GPU scheduling as it helps improve your computer’s overall performance. You’ll likely see performance improvements when you’re running resource-intensive tasks, such as video editing or gaming.
The only reason you shouldn’t use this feature is if you experience any issues after enabling it. If your apps suddenly stop working or you have graphics-related problems after turning it on, then GPU scheduling is best left disabled. Fortunately, disabling the feature after testing it is as easy as turning it on.
What You’ll Need to Make This Feature Work
Though this feature debuted with Windows 10 May 2020 Update , it still comes disabled in Windows 10 and Windows 11. Also, your computer needs to have an NVIDIA (GTX 10-series and later) or AMD (5600 series or later) graphics card with the latest graphics driver.
Unfortunately, there is not yet any specific hardware combination (CPU and GPU) known to eke out the best performance using the feature. So, your mileage may vary depending on the CPU, GPU, and graphics drivers on your PC.
Here’s how you can enable it on your Windows 10 and 11 PC. It’s a good idea to update the graphics drivers on your PC before you begin.
Turn On Hardware-Accelerated GPU Scheduling in Windows 10
There are two ways to enable Hardware-Accelerated GPU Scheduling on Windows 10: use the Settings app or the Registry Editor. Both accomplish the same thing, though the Settings app is much easier.
Using Settings
Start by launching the Settings app on your PC. You can do this by pressing Windows+i.
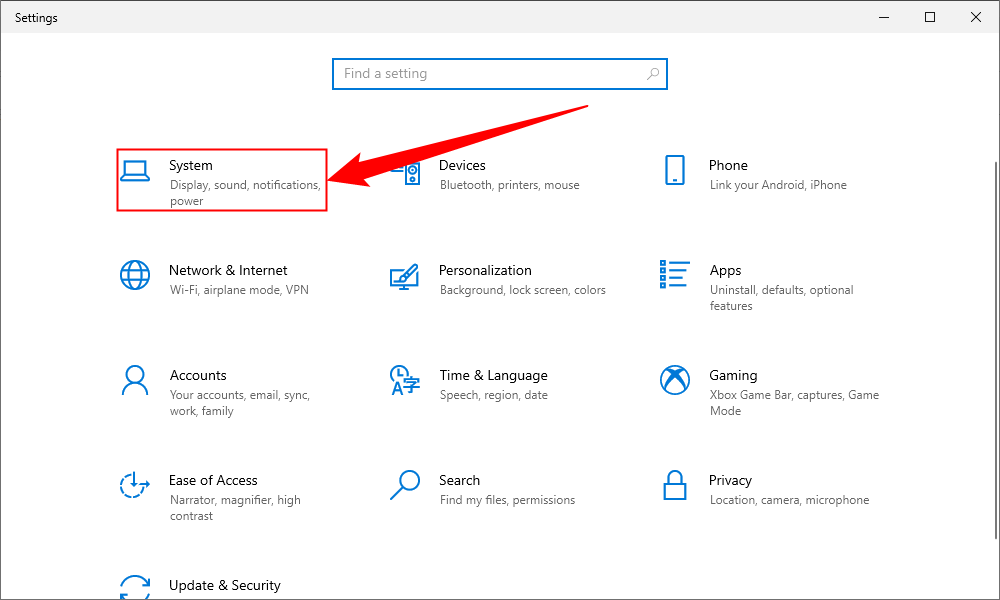
In Settings, select “System.”
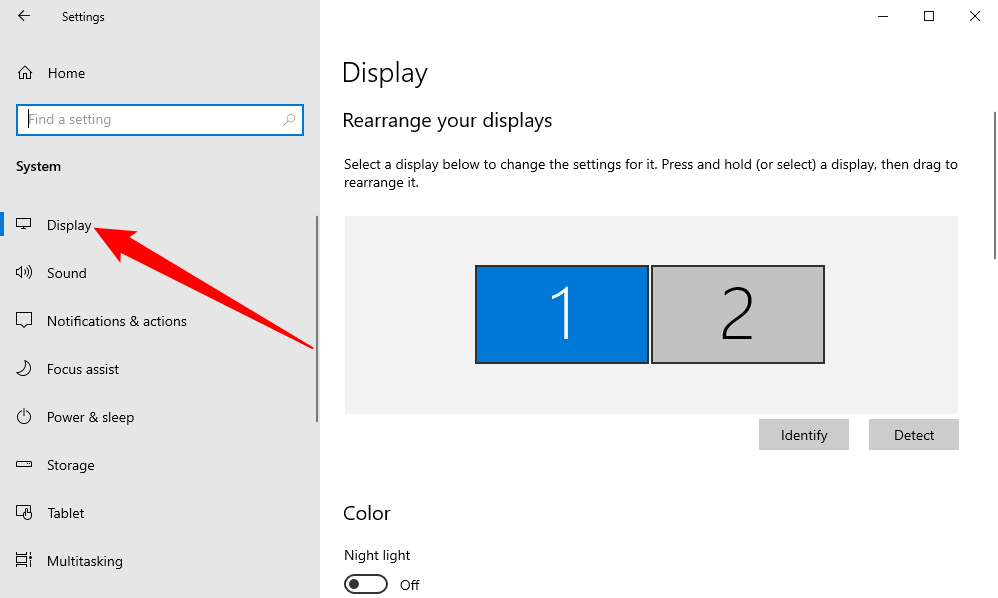
In the sidebar on the left, click “Display.”
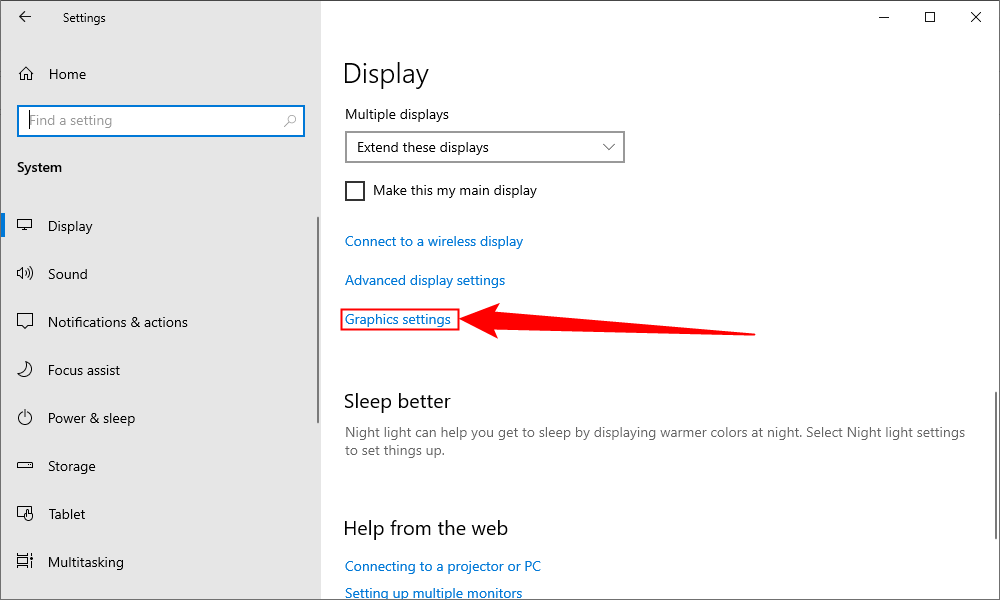
On the right pane, at the bottom, choose “Graphics Settings.”
On the following screen, toggle on the “Hardware-Accelerated GPU Scheduling” option.
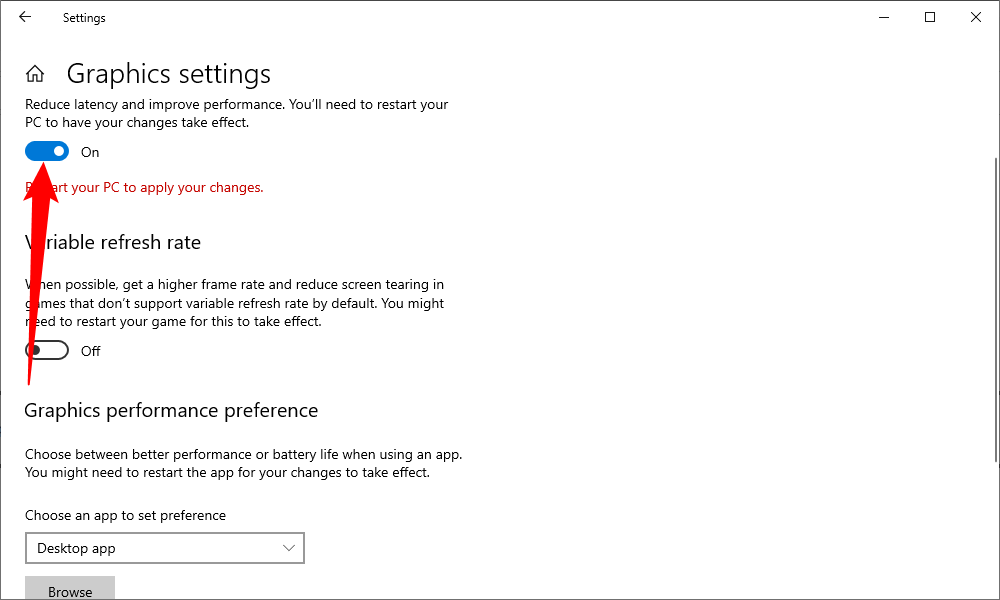
To disable the feature in the future, simply toggle off the “Hardware-Accelerated GPU Scheduling” option again.
Close the Settings app and reboot your PC to bring your changes into effect.
Using the Registry Editor
To enable Hardware-Accelerated GPU Scheduling via the Registry Editor , open the Run box by pressing Windows+R, then type the following and press Enter:
regedit
In the User Account Control prompt that opens, select “Yes,” since it’s necessary to make changes to the registry.
When the Registry Editor opens , in the path box at the top, type the following and press Enter:
Computer\HKEY_LOCAL_MACHINE\SYSTEM\CurrentControlSet\Control\GraphicsDrivers
In the pane on the right, double-click “HwSchMode.”
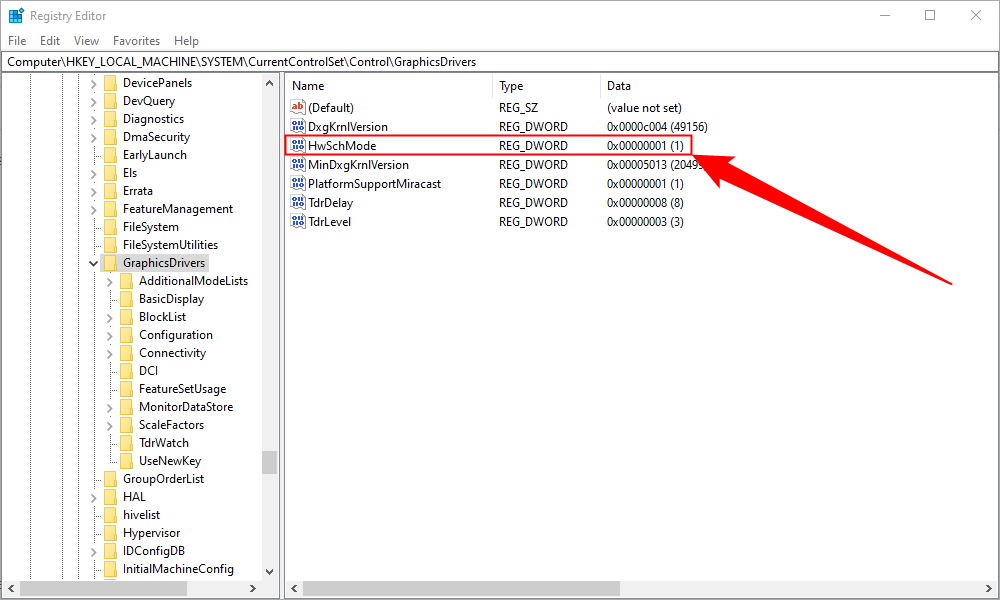
On the entry edit box, select the “Value Data” field and enter 2. In the “Base” section, choose “Hexadecimal.” Then, select “OK.”

In the future, to disable the feature, enter 1 in the “Value Data” field, choose “Hexadecimal,” and select “OK.”
Close Registry Editor, restart your PC, and you have Hardware-Accelerated GPU Scheduling enabled on your computer. Enjoy!
Enable Hardware-Accelerated GPU Scheduling in Windows 11
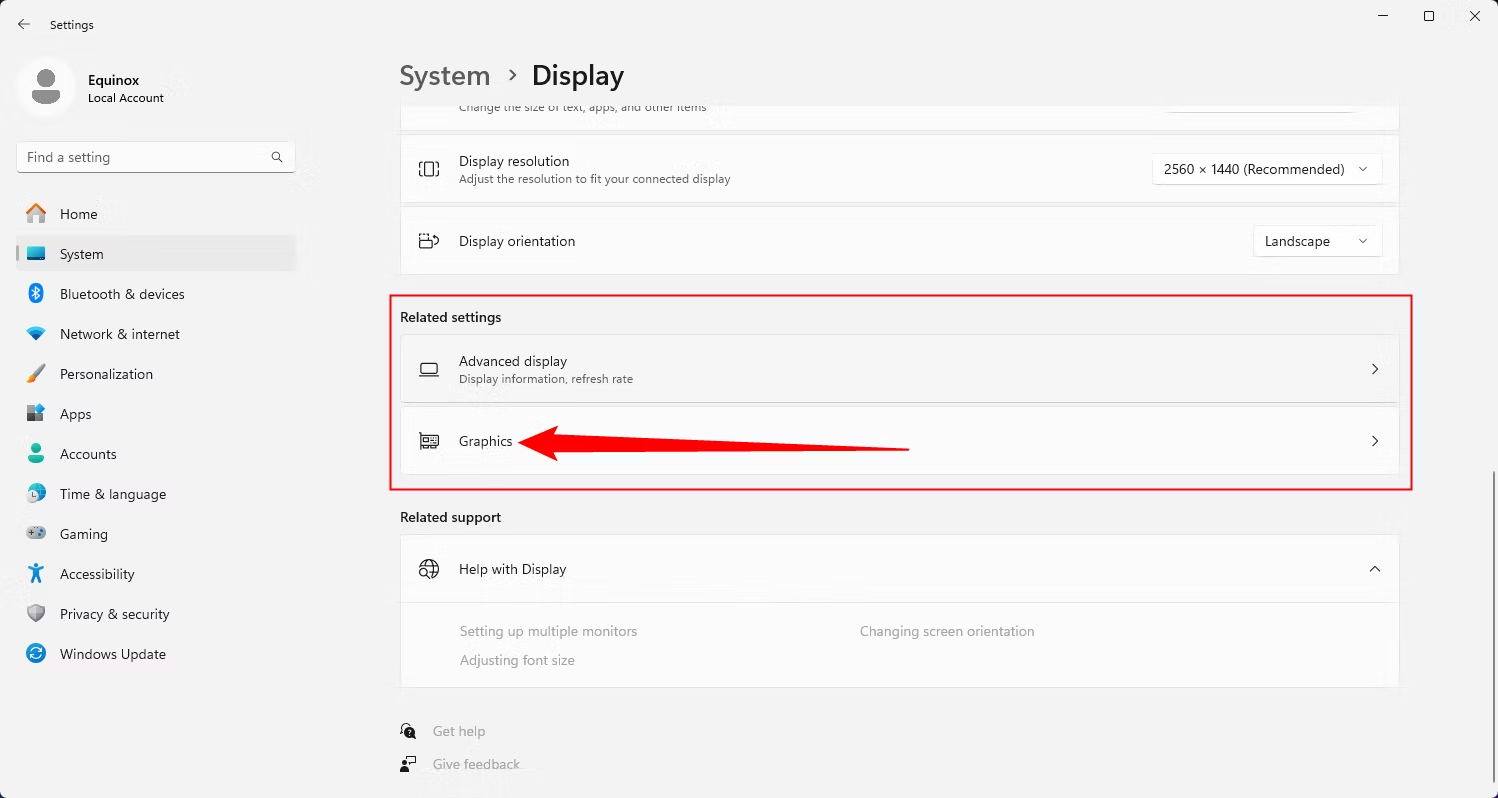
To enable the GPU scheduling in Windows 11, press Windows+i to open the Settings app. Go to the “System” section, then select the “Display” option from the right-hand side.

From the “Related Settings” section, select “Graphics.”
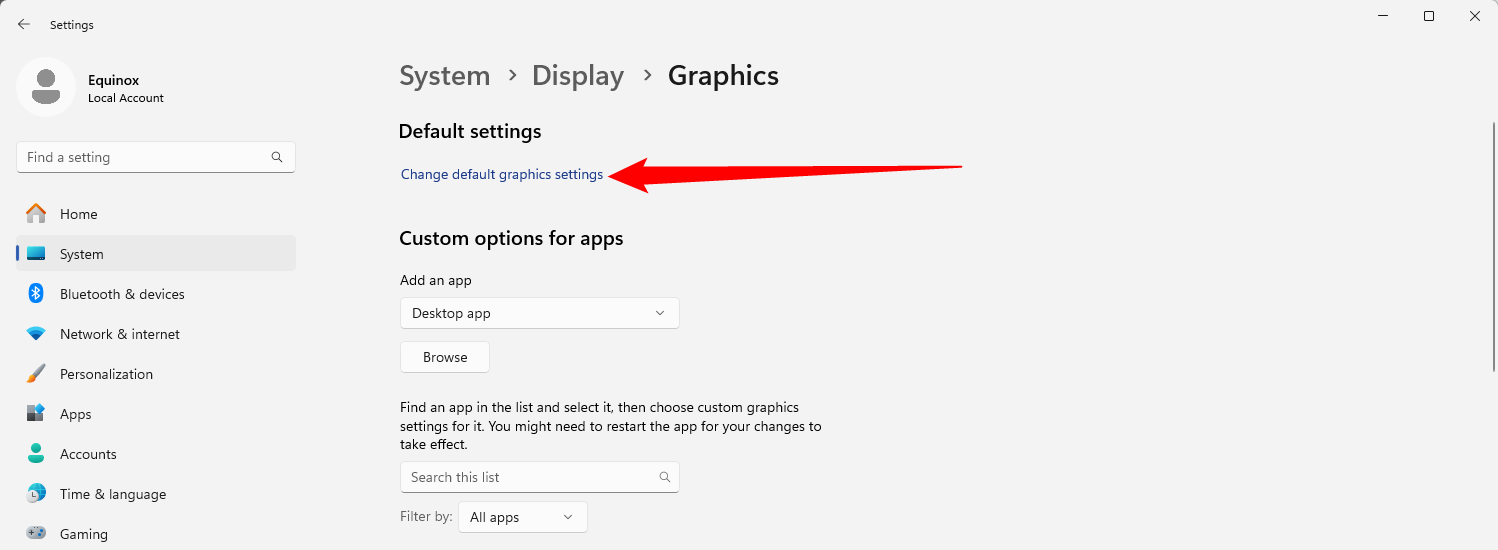
Choose “Change Default Graphics Settings.”
Then, toggle on the switch under “Hardware-Accelerated GPU Scheduling” and select “Yes” from the User Access Control prompt that shows up.
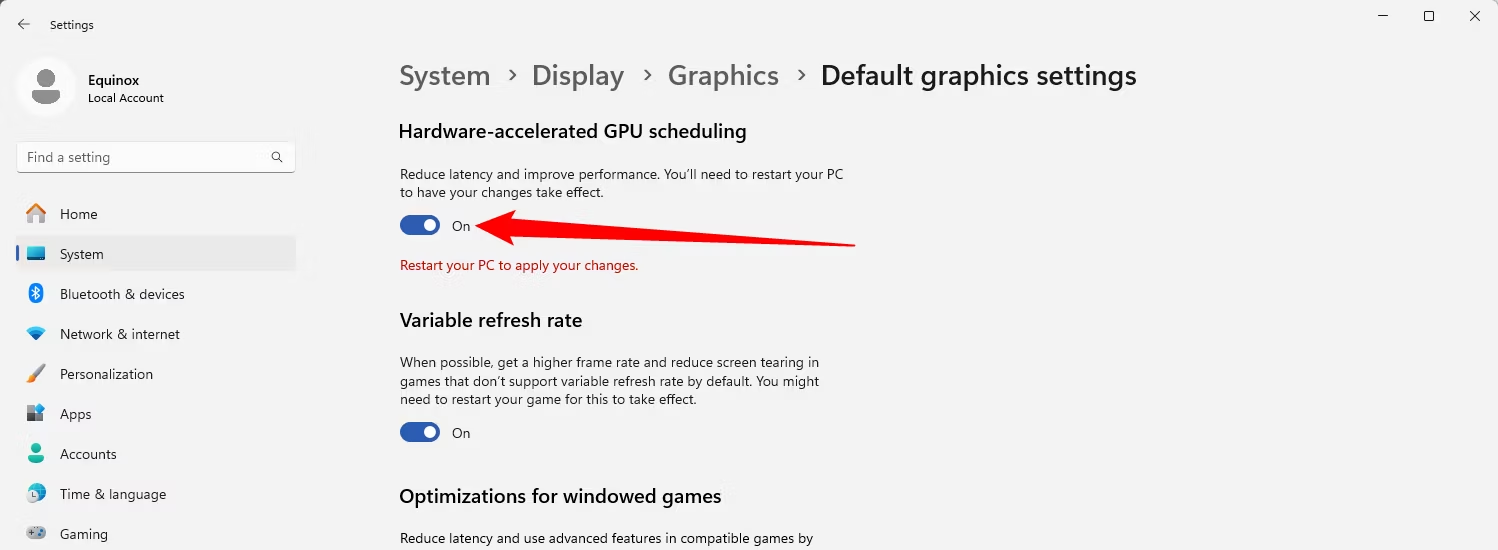
If you decide you want to disable GPU scheduling later, simply toggle off the “Hardware-Accelerated GPU Scheduling” option.
After that, you can close the “Settings” app and restart your PC to apply the change.
Microsoft states that you may not witness any significant changes immediately. However, if this feature hinders your PC’s performance instead of improving, you can disable it.
That’s it! You can check if it improves the games and apps experience on your Windows 11 PC.
Also read:
- [New] 2024 Approved Streamline Your Tweets with Correct Videography (Aspect Ratio)
- [New] In 2024, Bringing Imagery Elements Into Harmony
- [Updated] In 2024, Splendid Screenplay Strategies for Spectaculous Lights
- [Updated] Mastering Privacy Stopping Followers on IG for 2024
- 10 Best Fake GPS Location Spoofers for Samsung Galaxy Z Flip 5 | Dr.fone
- Discovering HuggingChat: A Comprehensive Guide to an Open-Source Contender for ChatGPT
- Eliminating Empty Directory Error Code 0X80070091 in Win11
- Exploring the Benefits: How Claude AI Takes the Lead Over ChatGPT in Four Ways
- Humor Algorithms at Play: Can Tech Tickle Funny Bone?
- Leve fryktløst | Free Book
- Navigating ChatGPT's Legal Issues: Insights & Tips
- Optimiser Les Dimensions De Vos Stories D'Instagram : Une Stratégie SEO Efficace
- Resolving the NW_Store.exe Program Crash: Effective Troubleshooting Steps
- Title: Guide to Turning On Hardware-Based GPU Task Prioritization for Enhanced Performance in Windows 11
- Author: Jeffrey
- Created at : 2024-11-13 16:51:29
- Updated at : 2024-11-18 17:04:15
- Link: https://tech-haven.techidaily.com/guide-to-turning-on-hardware-based-gpu-task-prioritization-for-enhanced-performance-in-windows-11/
- License: This work is licensed under CC BY-NC-SA 4.0.